
Tennis elbow: The facts – Tennis elbow: The Myths
24th March 2016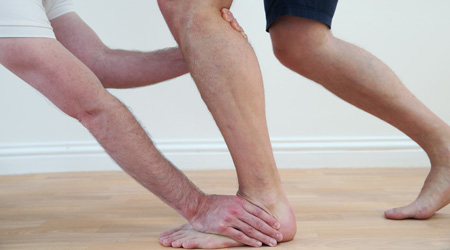
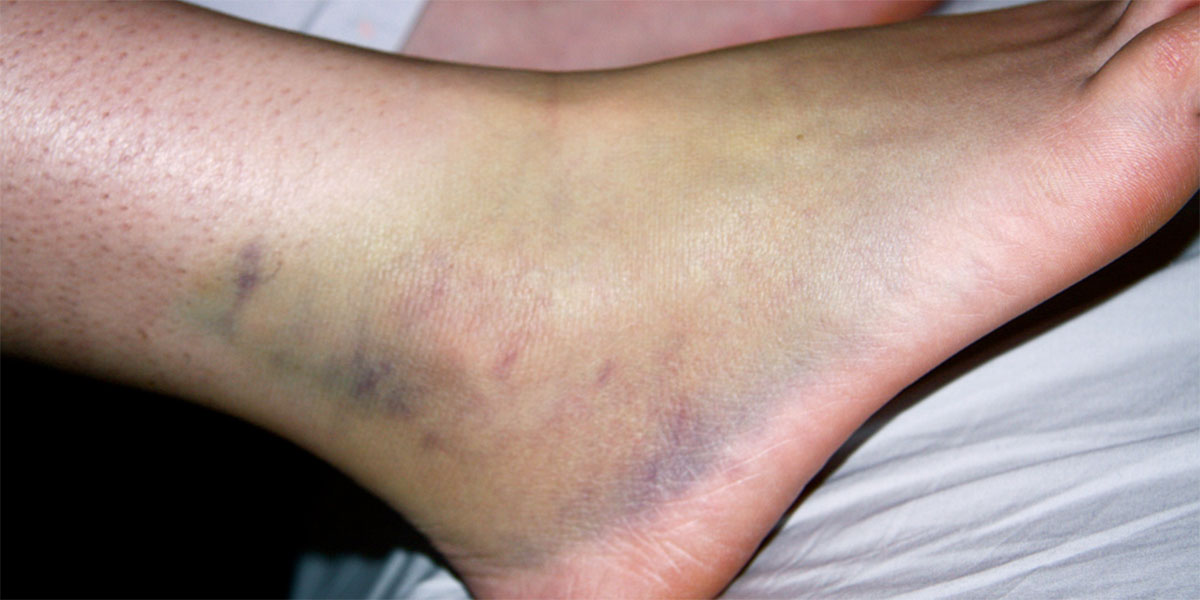
Does this look familiar? Not a pretty sight eh? When you look at your ankle and it looks like this you wonder how long it will take you to recover? We have put together a guide on how to get your ankle back in shape following an ankle sprain.
First things first – if it is swollen and bruised use the RICE method. Rest, Ice, Compression and Elevation. The aim is to minimise the amount of swelling. In addition to this, if you are able to, take some NSAID’s such as ibuprofen.
In the initial stage of injury there is an inflammatory reaction. This is a good thing. But if it can be managed well then shorter recovery may be possible. This stage lasts for a few days. The ice treatment is arguably only useful for about the first 48 hours. It is also quite useful for numbing the pain but be careful not to give yourself an ice burn!
If the ankle is very swollen, don’t walk on it for a couple of days. If the swelling is minimal you can probably walk on it fine. The aim is for normal walking. i.e. no limping. If that means crutches then that is fine. but no longer than 5 days.
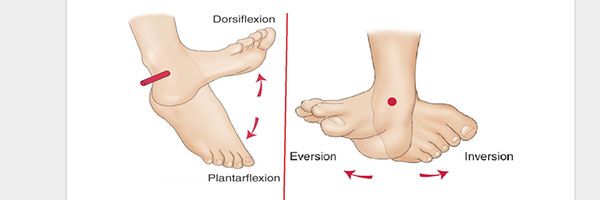
In this stage don’t overdo it for the first couple of days but then you need to start moving the ankle within pain. A useful phrase is ‘ to it not through it’. The pain you may get does not mean more harm or damage, you’ve already done that! It just means “be mindful of this, I have been injured recently”. Simple movements can be seen in the pictures below.
Once you can bear weight on it comfortably you can begin to practice your balance by standing on one leg. The injury and swelling interferes with the ability of the sensory receptors in the area to send messages up to the brain about which muscles to switch on. The more you practice, the more messages you will send. Think of it like a light bulb on a dimmer switch. It is down low and you want to light it up. “it” being your brain and the sensory receptors.
As the inflammation burns out you go into the repair/regeneration phase. This is where new tissue is produced and laid down in the area. It is a bit haphazard and if you imagine it used to look like bundles of dry spaghetti it may now look like cooked spaghetti i.e. a bit messy but structurally sound. And don’t panic! It does not stay like this…. if you continue with your rehab.
Now it will heal whether you like it or not, so do not worry about it. What it will do is feel a bit stiff as the new tissue has not been exposed to movement and the brain is also saying “ last time we moved like this we got injured”. So the key is slow and steady and gradually exposing it to the normal movements it had pre injury.
During this phase and as time continues into the final remodelling phase you are attempting to do a few things:
- Restore normal movement
- Strengthen the muscles in the area
- Regain balance (proprioception)
- Expose the healing area to stretch/pressure and load
I cannot over emphasise the term “graded exposure” enough. The key is gradual. It may feel a little tight or painful if you overdo it, but then you just back off a bit. Do not do what we call “boom and bust” which is where you think “oh, the ankle has felt ok for 2 days, I know what, I’ll go for a 5 mile run” and then you are surprised that it is really sore!
As a rule if it feels fine, it is fine. If it is a bit sore but settles quickly, it is fine. If it is sore for over 24 hours after doing something it was maybe a bit much for it at that time.
We are experts in sports injury management and want to get you back on track ASAP.
If you continue to struggle with pain despite following all the steps above please get in touch, we can help.
It would be great to hear your comments about this article